Wooo!! It's cold here today!! I know some of ya'll aren't nearly this cold but to me it's FREEZING!! I live down here in the Everglades because of the subtropical climate....now where is my subtropical climate??
I haven't done much nail art over the last few months...and honestly, for awhile there I was walking around with BARE NAILS!! oh the horror!! Seriously. Right now I have zero color on my nail but I do at least have a clear coat of Gelish to protect my nails. They got so raggedy I couldn't take it anymore. I just cut them down to nubs and put the clear coat on so I could grow them out again.
I thought I would go ahead and post a few of the pictures of Nail Art I've done when I did it.
Showing posts with label Gelish. Show all posts
Showing posts with label Gelish. Show all posts
Wednesday, January 22, 2014

Monday, February 11, 2013
Return Of The Nail Art!
I've been pretty busy over the month of January! I've been keeping on track with my New Year's resolutions, filling some custom orders for nails, and helping my husband with his palm trees. In fact, Today I worked on the very plants used in the background photo for this blog and my website!
Tuesday, December 11, 2012
A little twist on a classic look
Today I am showing you some pictures of what I've been doing with my time lately. I finally got around to taking some photos. These are available for sale on ebay.
I really liked the Christmas Tree designs with the zig zag style trees and decided that would be perfect to do with mirco-beads since I have so many left from the Fish Egg Mani trend that was so hot last spring. I also took the time to use the Gelish Structure Gel to overlay the bead design. It makes for a smooth nail and keeps the beads completely secure! I have about a bazillion designs in mind for beads and other little nail art doo-dads along these lines.
Now, to the pictures!!
I really liked the Christmas Tree designs with the zig zag style trees and decided that would be perfect to do with mirco-beads since I have so many left from the Fish Egg Mani trend that was so hot last spring. I also took the time to use the Gelish Structure Gel to overlay the bead design. It makes for a smooth nail and keeps the beads completely secure! I have about a bazillion designs in mind for beads and other little nail art doo-dads along these lines.
Now, to the pictures!!
Thursday, August 30, 2012
That Was Unexpected!
Good Morning! I've never mentioned it here but lately I find myself considering opening my own little nail studio. I keep seeing all this wonderful equipment out there on the internet that would be great for a little studio. I could easily reinvest all my income from my call-in business and grow my business by doing that. However, I do still have to do my share to pay the bills, so that's not a very realistic plan. With that in mind, I have recently been doing some job hunting looking for a part-time "day job" so I can seriously make moves in that direction.
I got a call this afternoon for an interview tomorrow, so that means I had to re-do my nails! woohooo! With all the busyness that came with preparation for then Tropical Storm Isaac, I missed last week's blog post and also skipped out on doing my own nails. Because the call came early in the evening rather than morning or afternoon, there was little time for me to do my own nails. Rather than my usual process of removal - I decided to just go with a "fill". The nature of the job meant that I couldn't be too bold with my color and design, so I started with just a coat of red once I'd prepped the nail. I noticed that the glitter from my old manicure was showing through that one coat of red and I really liked the way the black from the old design showed through as well. That settled it - I knew what I was going to do! Gelish Sandwich with a black french tip!


I got a call this afternoon for an interview tomorrow, so that means I had to re-do my nails! woohooo! With all the busyness that came with preparation for then Tropical Storm Isaac, I missed last week's blog post and also skipped out on doing my own nails. Because the call came early in the evening rather than morning or afternoon, there was little time for me to do my own nails. Rather than my usual process of removal - I decided to just go with a "fill". The nature of the job meant that I couldn't be too bold with my color and design, so I started with just a coat of red once I'd prepped the nail. I noticed that the glitter from my old manicure was showing through that one coat of red and I really liked the way the black from the old design showed through as well. That settled it - I knew what I was going to do! Gelish Sandwich with a black french tip!

You can almost see the glitter showing through but not quite. I wasn't able to capture the glittery effect no matter how hard I tried. I will say that it very much was like "Ruby Pumps" Lite. lol It has all the depth but the glitter is not quite as in your face.

Another shot from a different angle. I used "Hot Rod Red" here and it's a fairly versatile color. It very much reminds me of a "jelly" finish in regular polish. Sheer but opaque after a second coat and never streaky. Perfect for the Gelish Sandwich! I'll be adding nail art to this as the week goes on but for now I decided to keep it a little more toned down for tomorrow!
Sunday, August 12, 2012
Post Wedding Check-in
Well, I have made it through all the insanity and I think I managed to not loose my mind. lol We are now moved into our new place (though not completely) and we had a lovely wedding, and we're enjoying our "family honeymoon" this weekend. I'll be back to posting regularly, but initially, I will no longer be making daily posts. I will, however be posting at least once a week while I try to get our daily lives back to normal and get the lil one set up for the new school year.
Without further ado - I bring you a wedding photo! For the moment, it's the only one I have access to but I promise to post at least one more of the entire dress.


Without further ado - I bring you a wedding photo! For the moment, it's the only one I have access to but I promise to post at least one more of the entire dress.

Of course, since this is a nail blog - this entry would not be complete without a photo of my manicure for the day!! I did my nails with Gelish and I took this picture almost a week later so there is some growth going on there. I still love the look!

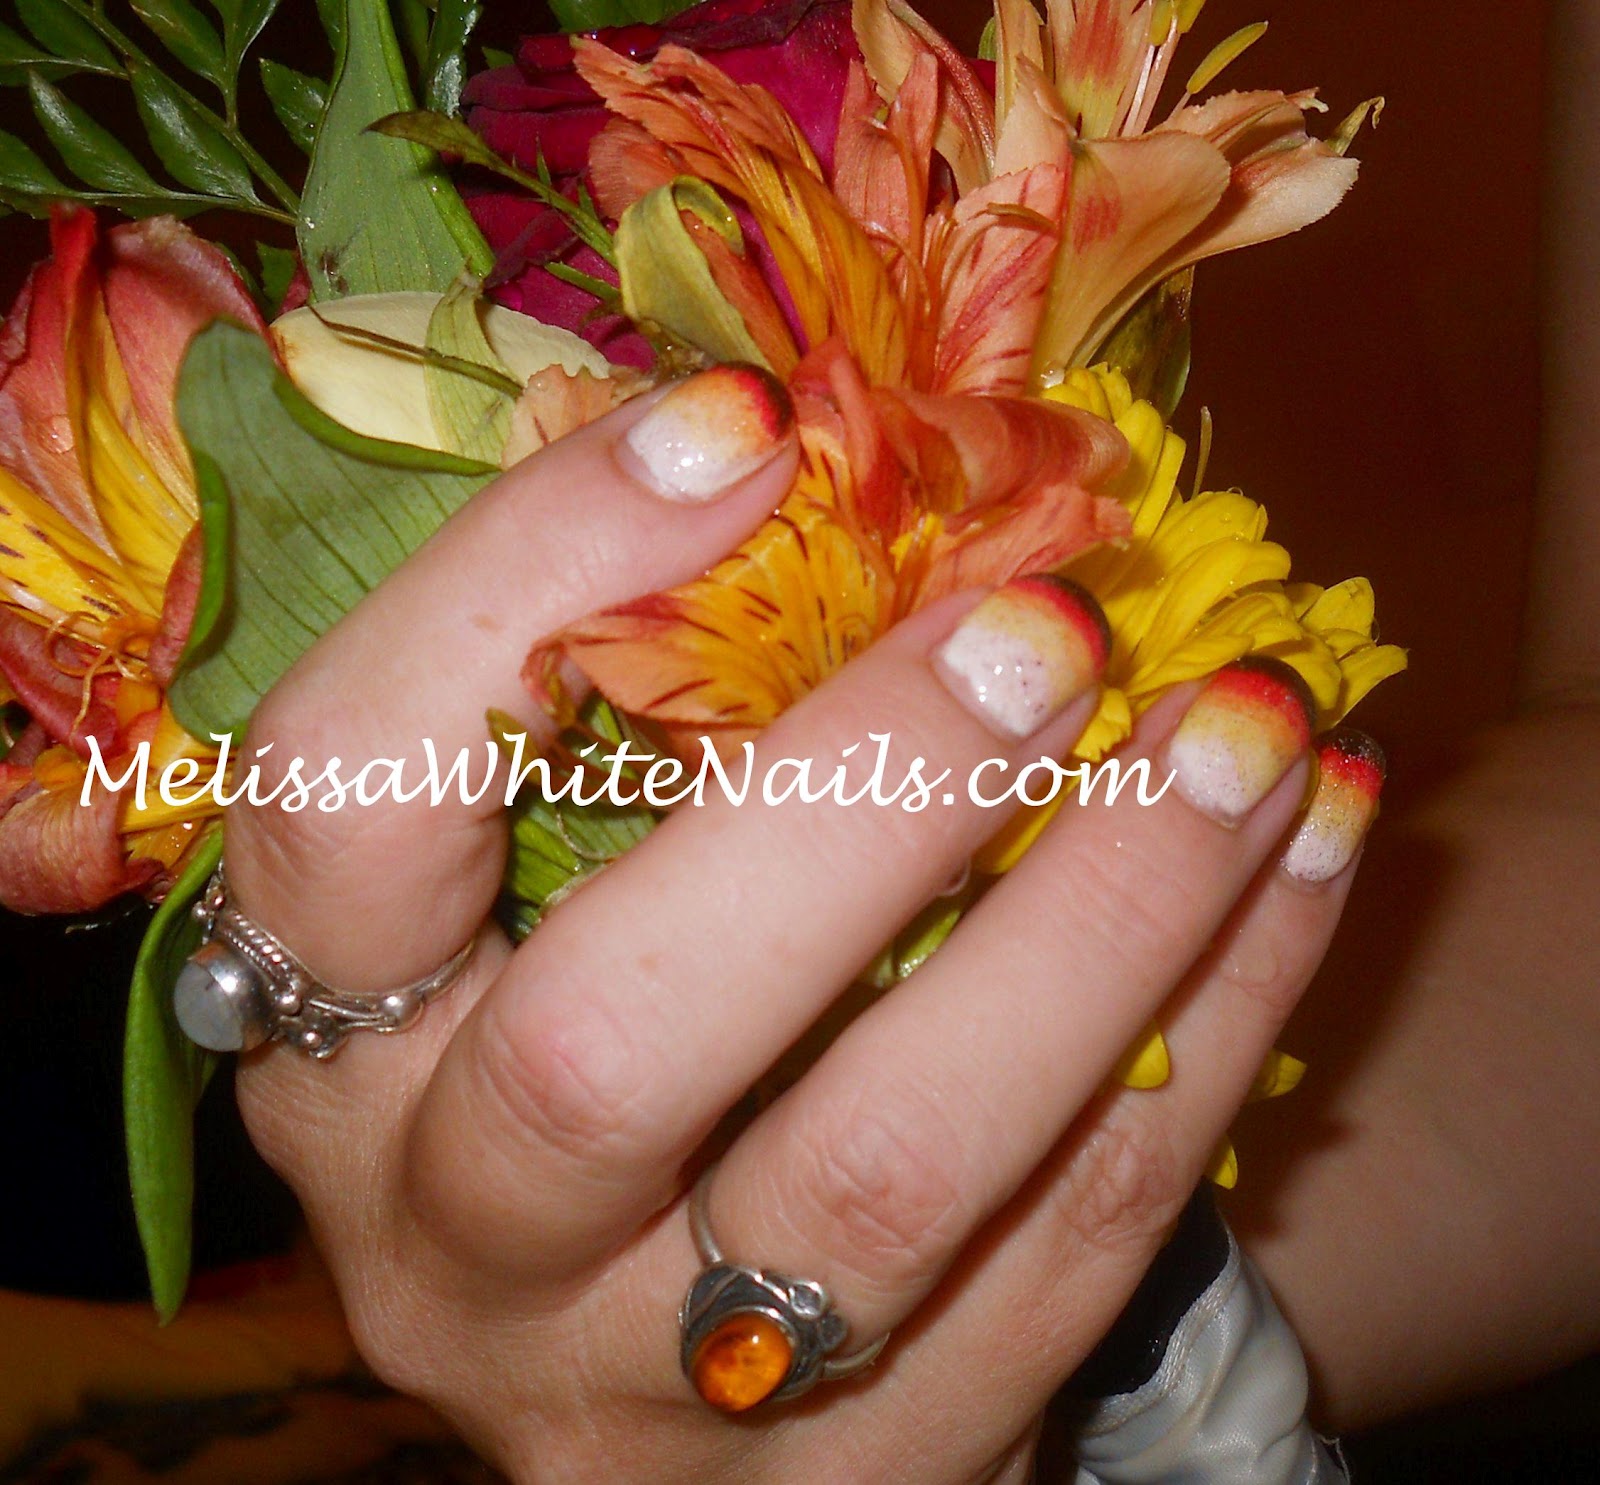
The flowers are from my daughter's bouquet. She was one of my bridesmaids and I had to get the nails with the flowers becauses I did like my wedding flowers. I wonder how much of that is because I did my own flowers? haha!
That's all for this week - I'll see you all next Sunday! Have a nailicious week!
Sunday, May 20, 2012
More Experiments with Gelish
Happy Sunday! I hope you all enjoyed your weekend, I am on the road to recovery from my recent illness. It was not serious but it was enough to keep me from my blog and nail art for awhile.
While I was away, I did change my gelish and for those of you that also follow my twitter, I discussed trying to create a gelish sandwich and a sunset gradient. My sunset gradient is one of my most popular nail art designs, especially in the gel. However, during the removal of my old gelish manicure, I accidently broke THREE nails down to the nail bed. It was pretty devastating for me because they are so short, it looks like I bite my nails or something like that. But I can't stand uneven nail lengths, so I cringed and cut and filed away. I reapplied my new gelish mani doing it in the usual way on my left hand and trying to incorporate the "jelly sandwich" technique into this gradient.
I have very mixed feelings about how this experiment came out. You be the judge.


While I was away, I did change my gelish and for those of you that also follow my twitter, I discussed trying to create a gelish sandwich and a sunset gradient. My sunset gradient is one of my most popular nail art designs, especially in the gel. However, during the removal of my old gelish manicure, I accidently broke THREE nails down to the nail bed. It was pretty devastating for me because they are so short, it looks like I bite my nails or something like that. But I can't stand uneven nail lengths, so I cringed and cut and filed away. I reapplied my new gelish mani doing it in the usual way on my left hand and trying to incorporate the "jelly sandwich" technique into this gradient.
I have very mixed feelings about how this experiment came out. You be the judge.

It came out ok but unlike the previous attempt with the sheer color - the glitter doesn't really pop through...it's so much more subtle. This is a disappointment for me, because the boldness of the colors with a sunset gradient requires less subtlety and that super visible depth that I had with my regular Gelly Sandwich.

There's a macro shot of this one. Please pardon the horrible length. You can see the glitter is there if you go poke someone's eye out or stare at it for awhile. Let me post the pix of the sunset gradient the way I normally do it with the shimmery glitter coat on top of the gradient.

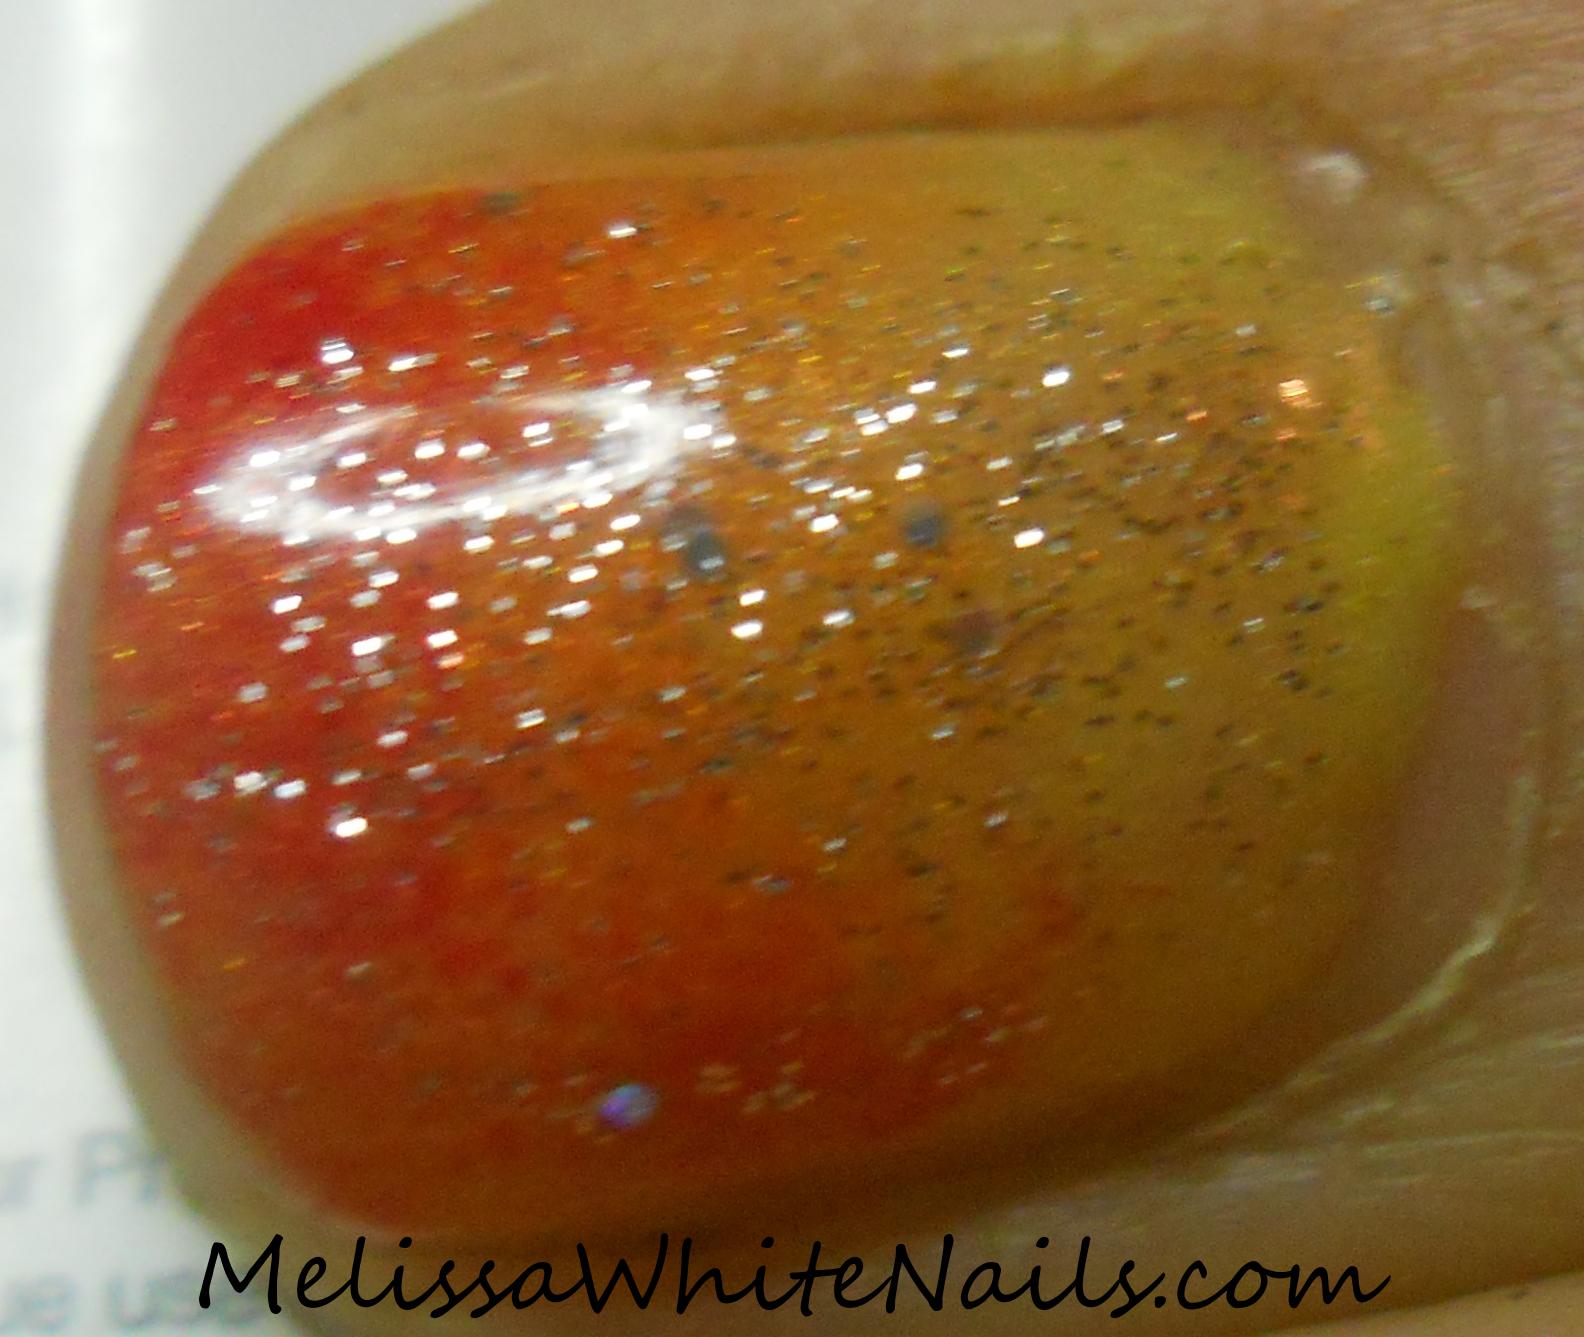
I think the regular sunset gradient came out much better. Not just because of the shimmery glitter being on top but also because I did a better job sponging it on with this hand too. This was an all around experiment on a number of levels. Normally, when doing a gradient using gelish, I do one coat with more definite 'lines' and then sponge on the next color to blur the line. I had used this technique because each color requires two coats and when I started working this out with the Gelish I was not as good with gradients in general or working with the gel itself as I have become over the last few months.
The change in my gradient technique is a definite WIN, but the Sunset Gelly Sandwich is a fail in my book. What do you think??
Saturday, May 5, 2012
Polka Dot Cherries
Good Morning and a Happy Saturday and Cinco de Mayo to all my fellow nail art freaks! I was in a bit of a silly mood when I did today's nail art and I thought it would be a fun one for a Saturday. Polka dots with an accent nail full of cherries!


I used my Gelish Gelly Sandwich as the background color for this one just because it's pink and sparkly and I love it. Using my dotting tool I made polka dots and the cherries using regular nail polish, Essie's "Swing Velvet" and using a think nail art brush and Sally Hansen's Xtreme Wear, "Emerald City" to make the cherry stems and leaves.

I still love how some of the larger pieces of glitter shows through "swing velvet". It definitely suited my mood for Cinco de Mayo! I probably should have come up with something more "mexican" looking but I drew a blank so I went with the overall feeling I have every Cinco da Mayo - fun!!
Thanks for reading and remember! Be safe and No Drinking and Driving!
Wednesday, May 2, 2012
Let me try it one more time!
Good Morning and Happy Hump Day! It's Wednesday and today I'm a little sad. It's my last day being the primary teacher at my daughter's preschool. After this, I'm only scheduled to be "hall monitor/time out" and then the school year will be done. My babygirl is growing up and I'll miss spending my mornings with the other kids too.
Since I'm a little bummed, I decided to post more blue squishy goodness to cheer me up! Yay! Yah, I really am that easy to cheer up.
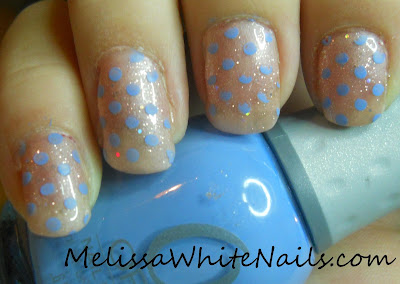


Since I'm a little bummed, I decided to post more blue squishy goodness to cheer me up! Yay! Yah, I really am that easy to cheer up.
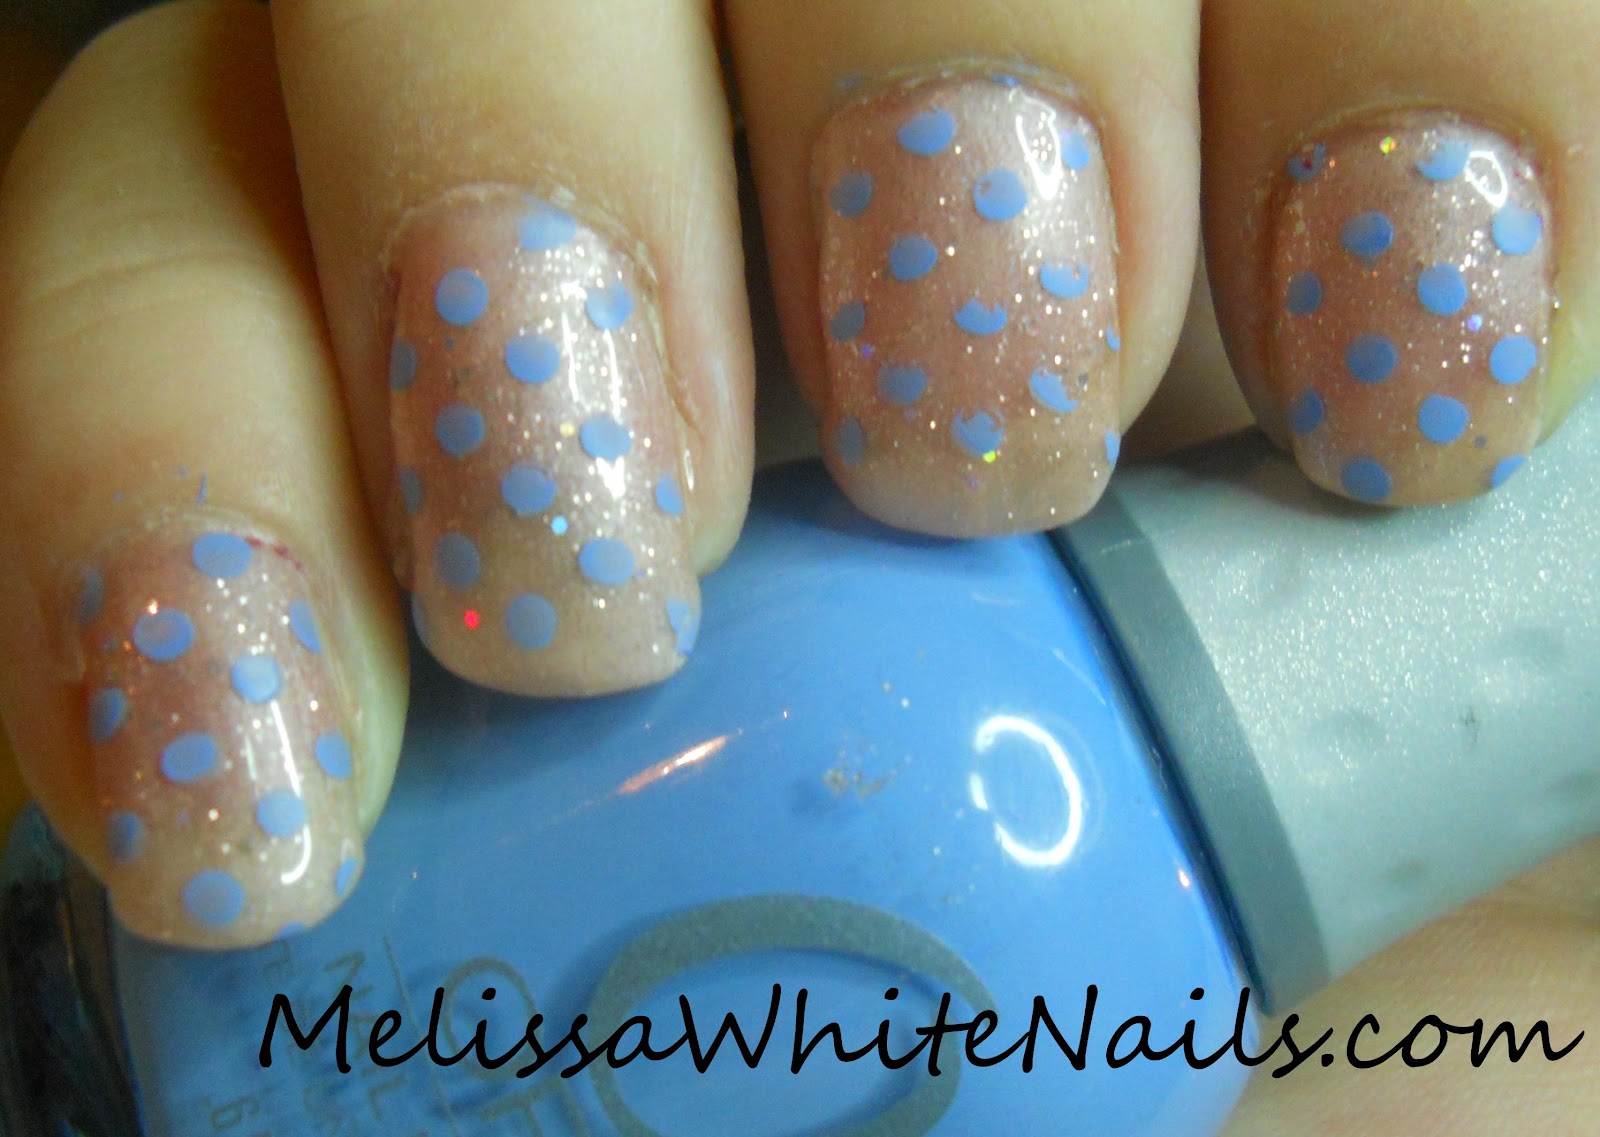
I stamped this one, but in hindsight, I probably would have done better to use my dotting tool. I just wanted to try out that plate and see how it looked.

I just can't stress enough how awesome this looks and I have gotten many compliments on these. Ok, one more just because I can and it's awesome.

I hope you enjoyed my blue squishy love fest this morning and thank you for reading!!
Tuesday, May 1, 2012
Bling me!
Good Morning and Happy Tuesday. Today's post is going to a quick one, this nail art is one I did with Prom in mind.
Here I just added rhinestones and microbeads to my Gelish "Gelly Sandwhich"


Here I just added rhinestones and microbeads to my Gelish "Gelly Sandwhich"

I thought I'd add an accent finger with a more elaborate microbead design around the rhinestone.

That's all I have for you today, thank you for reading!!
Monday, April 30, 2012
Monday Morning Funky Blue
Good Morning. You might have noticed that I didn't make a post yesterday. I was horribly sick over the weekend and just not able to do my nails at all. I'm feeling so much better now and I ran off this am to get to it. Is it sad that I meant to do just one or two but did a whole lot more?? It's also rainy today and will be all week, so I'm very much in a "blue" mood. I'm also totally in love with Orly's "Snowcone" this week too.


On that note, today's nail art is still my "Gelly Sandwich" with a funky blue pattern stamped over it.

I love how opaque this blue is here. It definitely gives some serious dimension to the overall design.

And here's one more picture because I really am loving it.

That's all for today. Sorry for missing a day and thank you for reading!! Tomorrow I'll have a more prom themed post for you!!
Saturday, April 28, 2012
Gel-ly Sandwiches
Good Morning and a wonderful Saturday to you! I'm soo excited about today's Nail Art. After removing my Emeral Fish Egg Mani, I also removed all my Gelish polish. Time for a new Gelish Manicure! After seeing the many "jelly" themed tweets and blog posts by Jeanette at the swatcholic I was completely inspired to see how a "Gelly" sandwich would look using my Gelish.
For those that are not familiar with the term "jelly sandwich" it's a layering technique involving using "jelly finish" polishes with a layer of glitter in between. Now Gelish doesn't have a "jelly finish", however, it does have shades that are sheer which would work like a 'jelly', and some very nice glitters. You'll have to pardon the low lighting here - using flash and bright light, you just couldn't see any of the glitter or the effects that it actually has.


For those that are not familiar with the term "jelly sandwich" it's a layering technique involving using "jelly finish" polishes with a layer of glitter in between. Now Gelish doesn't have a "jelly finish", however, it does have shades that are sheer which would work like a 'jelly', and some very nice glitters. You'll have to pardon the low lighting here - using flash and bright light, you just couldn't see any of the glitter or the effects that it actually has.

For this one I used my old favorite "Taffeta" and layered it over "June Bride". The silky finish of "Taffeta" over the glittery goodness is just stunning!! I love love love this!! So I'm going to show you another photo.

If you want to get a really close look - just click the pictures and you can see how great this effect is.

Then I decided to go ahead and stamp over it a tiger pattern using a berry polish and the glitter shows through that too which is just as amazing.

You can clearly see one of the larger pieces of holo glitter shining through the stripes on my middle finger and it's just amazing. I love this look and I think I'll be sporting it more often!
I hope you enjoyed today's Gelishicious Gelly Sandwich and thanks for reading!!
Monday, April 23, 2012
Delicate Bridal
Good Morning and Happy Monday! I'm off teaching preschool today, I was supposed to have the day off but I volunteered to cover for one of the other mom's who sprained her wrist. Poor girl has this HUGE splint on it and she really can't do anything with it. Besides, I like teaching these kids and there's not that many weeks left in the school year.
On to today's nail art. This is one I did during Valentine's but I find it still very much appropriate for the bridal season.


On to today's nail art. This is one I did during Valentine's but I find it still very much appropriate for the bridal season.

I decided to do today's pix large because this is such a delicate design, I really want you to see it properly.

The base color is a Gelish color, Taffeta with red and green polish stamped over it. A little regular nail polish remover and the bride is sporting a low-key but pretty look for the honeymoon!
That's it for today, tomorrow I will show the mani I have planned for my own wedding this summer. To say it's a bit non-traditional would be an understatement. Thank you for reading and have a Groovy day!
Saturday, April 21, 2012
Flowering Bride
Good Morning and Happy Saturday!! I hope your weekend is off to a good start! I'm continuing my bridal theme today and today's mani I'm going to show you a design in different mediums. Straight nail polish, using Gelish UV Soak off Gel Polish, and finally in acrylic. Let's get right to the nail art, shall we?


These are dried flowers that I purchased from Born Pretty, one of my favorite online sources for nail art materials. Although, I understand that I may soon have a more local to me source and I'm all for supporting budding businesses in my state. I normally like to do this with a rhinestone center but I'm currently out of the correct size and I thought I'd see how it looked using micro-beads as a center. I'm pleased with the outcome. We can't have the fingernail bling outshining the bling on the finger at a wedding now, can we?

Here is the exact same design using Gelish. Because the tips I had prepped were clear, I went ahead and added a base layer of pink to make the nails opaque. I used structure gel to "embed" the microbead centers and keep them firmly secure to the nail.

Here, we again have the flowers with micro-bead centers but now they are completely embedded in acrylic. I layered a glitter gelish polish and the gelish topcoat over the acrylic to give the design the same glittery look as the other mediums. Although, I could have also done this by mixing super fine glitter in with my acrylic powder. Finding loose, super fine, holo glitter is a bit of a challenge.
I hope you enjoyed today's Bridal Looks and it gave you something to consider, not just for your wedding but for those other special occasions. Some art can be done in other mediums, especially with fun things like nail foils, etc. Thank for reading and I'll see you tomorrow!!
Sunday, March 25, 2012
Dissatisfaction
Good Morning! I know my blog post is late but I was just too tired last night to write it and severely lacking in the inspiration. I had done my latest Gelish in this lovely green. It's an amazing sparkly green and I love the color. You might have noticed that my last few posts have not featured my hands, a large part of that is because many of the nail arts I wanted to do just don't go with this color and one of the designs I apparently am unable to do on my own nails.
All that being said, I still tried to do a nail art with this color and I'm just not satisfied with it. All is not lost though!! I finally got my order from born pretty store.


All that being said, I still tried to do a nail art with this color and I'm just not satisfied with it. All is not lost though!! I finally got my order from born pretty store.

As you can see from the picture, that's a whole lot of stamping plates but it also is dried flowers (clear round containers) and resin rhinestones (in the little baggie). With much encouragement from my significant other, I ran to my studio to check them out.
Again, the color became an issue but I think I did ok moving past it.

Going forward, I'll have to keep in mind that this color really is only for wearing by itself. In the meantime, I'm taking it off a week early and I think I'll go with a clear for now and start wearing some of my bolder nail arts on both hands!
Thursday, March 22, 2012
More Experimental Nail Art
Happy Friday Eve to you!! Today I have some more experimental nail art to show you. This time I'll be showing you two Gelish nail arts. I usually do just the Gelish as my base color, but these are completely done using Gelish polishes.


You can see the larger pieces of holo glitter in this photo and some of the pink holo shimmer as well. It's super sparkly that's for sure!!


This second one is a super glittery sunset with a beaded palm tree done in black. This is the same glitter I used in the one above but it doesn't quite catch the "holo" like the one above did. I was dying to do something beaded with the gel and here it the first one!
That's it for today. I'll be back tomorrow to show you some of my first attempts at using acrylic paints with nail polish to make flowers. I twitted some of them yesterday if you care to scroll back through my tweets to get a sneak peek!
Tuesday, March 20, 2012
Daisies in a field of green
Good Morning! Today I will be showing you my current mani that I've been wearing since Sunday! I stayed up pretty late Saturday night working on this because it takes me so long to take off the old Gelish colors. Since it's me doing it, I can only do one hand at a time, so it takes twice as long. I also couldn't decide what I wanted to do with this fabulous green!! I had been watching videos on you tube, by love4nails and one of her videos showed a different technique for doing flower petals than the one I had been using. I ultimately decided to give this a try, and here it is.


I had to take these with my phone, so I apologize if the photos are of a poorer quality.

I definitely like this technique. I'm not totally ready to dump the other method just yet, but I definitely believe that this would be ideal to use with Gelish. I also want to comment on the green color here. It's a shimmery frosted green and I really am amazed just how much I like it once I got it on and got it cured. I couldn't resist doing daisies since daisies are the perfect design to go with a green background! I hope you enjoyed and strongly encourage you to check out the other videos on love4nails' youtube channel!!
Do you watch a lot of youtube tutorials? Who are your favorites?
Tuesday, March 13, 2012
A More Subtle Approach
Good Afternoon! Today's post is a little later than normal because we spent all day yesterday welcoming my mother and father-in-law home after a two month cruise. After a wonderful but exhausting day, I was just too tired last night to remove my Gelish. I have been able to get to it and now I've found the time to post pictures of my efforts.
I decided to keep my gelish simple and just use a simple white. It's great as a background color and also great for putting polishes over. Since St. Patrick's Day is this Saturday, I thought I'd begin showing some St. Patrick's Day themed Nail Art.
Today's Nail Art I thought I would skip the obvious shamrock and go for something more subtle. I happened to have this design on my stamping plate and it always brings to mind "Celtic Knotwork". I thought it would be perfect for this one.


I decided to keep my gelish simple and just use a simple white. It's great as a background color and also great for putting polishes over. Since St. Patrick's Day is this Saturday, I thought I'd begin showing some St. Patrick's Day themed Nail Art.
Today's Nail Art I thought I would skip the obvious shamrock and go for something more subtle. I happened to have this design on my stamping plate and it always brings to mind "Celtic Knotwork". I thought it would be perfect for this one.

The green and orange are from the Irish Flag and I felt mixed with the knotwork, it would be a more subtle "Ode to Ireland". I'll leave it to you to decide how that worked, I personally like it.

And one more just because I can and have them today.

Here's a few more in the shade.


So that's about it for today. I'll be doing some more art later today to post during the rest of the week. I wonder if I can find a way to put "Guinness" on my nails? Because what's St. Patrick's Day without Guinness??
Monday, March 12, 2012
Pineapples
Today's Nail Art is relatively simple but I was just inspired by one of my favorite crystal and crochet patterns - the pineapple. One of my recent purchases has been a few new stamping plates and I have really wanted to do the pineapples. I couldn't think of any colors that just "go" with a pineapple - so I decided to just go ahead and put it over my Gelish Sunset Mani. The sunset always reminds people of the beach and I thought a pineapple would give it a tropical flavor.
That's all for today. Starting tomorrow I'll be doing St. Patrick's day themed Nail Art. Putting the luck of the Irish at your fingertips, literally.
 |
| Taken in full sun |
 |
| Also taken in full sun |
 |
| Taken in the shade outdoors |
 |
| Also taken in the shade outdoors |
That's all for today. Starting tomorrow I'll be doing St. Patrick's day themed Nail Art. Putting the luck of the Irish at your fingertips, literally.
Wednesday, March 7, 2012
Fairy in the Flowers
Happy Hump Day everyone! The week is half over. Today's post is going to be really quick because this morning I'm covering for one of the other mom's at my youngest daughter's preschool. Today's mani is not especially difficult or very challenging, however, it's the one I'm currently wearing and loving.


That's my Gelish sunset gradient as a base "color" for some stamping I did. I was looking to do the fairy since I have her on two different plates and it's just cute.The fairy really only fits on my middle finger and I felt that I just needed something else. So I stamped the flowers on the rest of my fingers, deliberately changing the alignment a little bit on each finger just to keep it from being repetitive and give the impression that she's in a field of flowers.
That's going to be it for today! See you all tomorrow!!
Monday, March 5, 2012
Gelish Grandients gone wild!
Happy Monday!! Continuing on with my ongoing gradient kick...today I bring you Gelish gradients. I have previously posted my "Fall Colors" gradient as part of my Gelish tutorial, and I'll repost it today but *after* the new one that I'm currently wearing and am in total love with!!


The flower is stamped using regular polish. I was tempted to use the gelish to paint on another palm tree, but I already did that design using all regular polish and it seemed kind of redundant. So, I just finished off with the topcoat sealer and then stamped the flower on......knowing I could change it to anything else depending on my mood. This is really the reason I just LOVE LOVE LOVE Gelish. Because I can change that multiple times a day and it can hold up! I think I have done a much better job getting the gradient. One of the challenges here is that the gelish half dries, just a film on top, so sponging with it doesn't always create that smooth transition you can get with regular polish. So i will sometimes cure that layer...then take a fresh sponge and very lightly dab to get it properly and then cure again. It really does help that the sponge is not picking up any extra from the nail. You can be the judge by checking out the last Gelish Gradient I did.

I hope you enjoyed today's Nail Arts and if you haven't already considered it, take a serious look at the Gelish products, or any of the UV cured Soak Off Polishes. They truly are a bunch of fun and soooo much more versatile than the manufactures even realize!! This is doubly true since nail art is transitioning from a trend into the Mainstream!
Subscribe to:
Posts (Atom)